Showing posts with label pix. Show all posts

Saturday, September 3, 2011

Interview: Rae and Syd from TweenyHair!

Hello everyone! Today we have an awesome interview for you. I checked out Rae and Syd's blog at TweenyHair!  The minute we saw this blog and the photos of Syd's stunning hair, we knew we HAD to feature her! This is what we all aspire to as our little girls approach teen-hood. Syd is an inspiration! Here we go....


(For the record, this here is the most epic twistout Steph has ever seen! Wow!)
Hi, I’m Rae and I’m the mother of 11 year old Syd. We both love Syd’s natural curls and coils and we agree that relaxers have no place in the future of her hair. The number of girls at school with natural hair is slowly dwindling as they choose to go the relaxer route. Syd knows that her natural hair will stand out more and more as she gets older, but she’s ok with that. She actually thinks it’s fun to stand out. Our challenge recently has been trying to find creative styles that fall somewhere between looking too baby-ish and too sophisticated. We’ve also begun to make the transition from mommy doing all the hair care to Syd learning to do it herself. We’re still in the middle of that transition now, with Syd doing more and more on her own all the time.


Syd says: I love my hair. Especially when it’s big! Sometimes it’s hard to do my hair because I have a lot of it, but I’m getting better and my mom is always here to help.

Here are Rae's answers to our KMC questions:

1. How would you describe the thickness and texture of Syd's hair? What was it like when she was young and it was shorter? How did you used to style it then?
Syd has very thick hair. Most of it is tightly coiled fairly tightly (4a) but there is a section of thinner, more loosely coiled (3c) strands up by her face. It has always been super thick, even when she was a baby, and it was several inches long by her first birthday. When she was younger, she mostly wore cornrow styles or various amounts of braided or twisted ponytails with beads or barrettes on the ends.

2. At what age did she stop wanting all the beads and barrettes?
She was done with barrettes by about second grade. The beads lasted a couple years longer. She is still ok with beads every once in a while, as long as they aren't the brightly colored plastic ones. Wooden beads at the ends of some cornrow styles can still look very age appropriate.

3. How did you first figure out how to do her hair once she wanted to stop the bling?
It wasn't as hard as you would think. For the cornrow styles, I did her hair the same as I always had and simply stopped added things to the ends. To replace the styles that consisted of lots of braided or twisted ponytails, I just removed the ponytail aspect and put her hair into box braids or twists instead.

4. How has the transition been into this "older age" with regard to how she feels about her own hair?
A few years ago, she was very self-concious whenever her hair was a little bit frizzy. Twist outs and braid outs could only be worn for one day because she didn't want anyone to see her hair after it started getting fluffy. Then around her 10th birthday she started to embrace her curls. She's now 11 and her favorite style is "big hair." (see photo at right...BIG!) She wears wash and gos, twist outs, and braid outs all the time.
5. How much of her own hair care does she do herself? Is she interested in it?
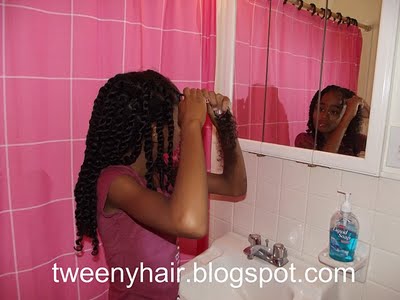
She washes, conditions, and detangles her own hair. I usually help her with the detangling because her hair is so thick and it takes her a long time to get through it all on her own. She can also remove braids and twists for the "out" styles and she can do her own 2 strand twists. I normally let her do the front and I work on the back section that she can't reach very well.  She's learning to cornrow by practicing on my head. Eventually, she'd like to be able to put the front of her hair into cornrows by herself, but we're not there yet. She's definitely interested in learning how to do her own hair, but she still likes that I do most of the actual styling.

6. How active is she and how does that play into her hairstyles. Do her styles hold up well?
Syd is a VERY active young lady. Right now, she's on the cross country team at school which means she has been running 4-5 miles a day in 80 - 90 degree weather. Needless to say, we're dealing with an abundance of sweat right now. Box braids hold up pretty well. Lately, we've fallen into a routine where she wears twists one day, a twist out the next, and then we cowash that night and twist her back up again. It's more time consuming, but it gives her the big hair she loves so much.


7. What are her 3-5 most favorite styles?

Wash and gos and twist outs to give her the volume she loves. She also likes small box braids and twists because she can style them different ways every day before school. Being able to go a few weeks without detangling doesn't hurt, either.

8. What is your hair routine with Syd?
Syd's haircare routine is constantly evolving. We shampoo every week or two. It just depends on how dirty her hair seems, when we're going to do new styles, etc. Our products are always changing. We always have Bee Mine products on hand, but we use plenty of other products, too.

9. What do you do after washing when it's wet, are you able to preserve the awesome curl definition after conditioning and detangling and just let it dry like that, and is it good to go? Also, how does she keep her hair at night?
If she wants to wear a down and out style, we can't just add product and go. We have to use Teri Laflesh's Tightly Curly method and define each individual curl one at a time. When she wears it down and we want to preserve the style for the next day, we make a part down the center of her head and very loosely put each side into a banded ponytail. We use one band at the base, one in the middle, and one at the end of each ponytail and we are sure to keep the bands very loose. It's really just to keep the hair from tangling up too much. She usually wraps a satin scarf around her hair at night and she always sleeps on a satin pillowcase.

10. I have to comment on how gorgeous these all-natural box braids are, in the photo at right. How long, and how long? :)
The box braids in that picture took about 5 hours to do and they usually last around 3 weeks, sometimes a little longer.


11. What are her thoughts about her hair and does she have any opinions on straightening or chemicals?
She loves her curls and swears that she will never use chemicals on it. She has had it straightened with a flat iron a couple times in her life, but she hasn't asked for that at all since she started embracing her natural hair. She actually notices how damaged some of the girls' hair is at school after they use relaxers and says she wishes they would keep their hair the way God made it.


We want to thank Rae and Syd for appearing on our blog, we will be following TweenyHair to see what kind of fun we have in store for us as our girls get older! We sure hope they have the confidence and spunk that Syd has, and will love their natural hair as much as Syd and her Mom!

Thank you!


Friday, August 19, 2011

G Gets Her Curl On!

From porcupine.....

To flower girl!


It's G's first wedding gig, and she was SO excited. It was a small one, but she took her flower girl and ringbearer duties seriously. We decided for this occasion we needed CURLS! This is the first time we have curled all her hair using the Soft Spikes. Putting them in was incredibly easy. You might remember Katie's review of Soft Spikes, and her video. I didn't want to take hours to put them in so I put about 4 to 6 locs in each spike. I knew that they would result in a big shrinkage in hair length, so I figured we would want the curls large so we'd get some of the length back. We put them all in during one movie, and I finished the several leftover after she went to bed.

We spritzed each set of locs with Taliah Waajid's Mist Bodifier with some high quality extra virgin olive oil added, before rolling them, so they'd be rolled damp. She had no trouble at all going to sleep with these in. They really are soft! We kept them in for most of the morning, just to make SURE the dampness was dry. Then when we took them out, those suckers were CURLY!


When G initially felt them with her hands she was thrilled. When she saw how short her hair now was in the mirror, she was not so thrilled! She decided she looked like a boy. Not exactly the feeling I wanted her to have for her first wedding experience! It took me awhile to get the style just right, and I think I adjusted and re-did so much that I pulled some of the curls out a bit too much, but in order to get some length back we ended up more with the wavy and tousled look. I also had an IDEA of how I was actually going to style it, but I manipulated it a couple ways before I settled on something. Initially I was going to do an updo in the back, like a french twist, and leave the curls all spilling around the top, but she didn't want that, she wanted length. So once I undid the updo, that had stretched some of the curl out. She wound up happy with the end result though. We utilized the sparkly headbands I bought, and a couple of glittery hairpins. I knew I had to stop messing with it or we'd lose more boing in those curls!

I had just finished tightening her locs the night before, and since I swept some of her locs up to put in the circular crystal pins you can see on top, it caused some of her parts to show. I think the flash made it more noticeable than it really was.


All in all, she was adored at the wedding and everyone loved her dress and her hair. I have to give a shout out to this seller on Amazon.com for the dress, because we looked at about 6 stores to find just a simple but dressy lavender or light blue dress to use (this was a simple wedding as you can see from the bride's dress above) and could find NOTHING. Pastels are not in right now and we couldn't even find anything in a dressy style. This dress was very simple, was not too satiny, just polyester, but for the price, I was very pleased. It fit perfectly. The edges were not turned under to be finished, as you can see when you zoom in on the photo at Amazon, but for basically a single-occasion dress, for getting the exact right color, degree of dressiness, and flair, I couldn't have been happier.

So, the Soft Spikes worked GREAT to curl her locs. I think once her locs are longer and curling them won't result in them being "boy-length" then we could just curl, finger comb them out, and go. We highly recommend the Soft Spikes!


Peace out!


Tuesday, May 31, 2011

A G Style Worth Posting About :)

SHE LIVES! Hi everyone. Yes it has been awhile. It's just been so crazy and I have been doing not much with G's hair other than some kind of 'tails or just leaving it down (ahhhhh the ease of locs!). She was also was way overdue for tightening and it just seemed to take me forever to get them all done this time.

All the second grade classes at G's school had a little performance last week, the theme was "It's a Bug's Life," and all the songs were, you guessed it, bug or garden related. So, how could I pass up that opportunity to use the Snapaholics butterfly beads with flower snaps on the ends?! I couldn't! I didn't!

It's always a dilemma for me to hang especially large hole beads on her locs, because I feel like I should twist or braid the locs in order to make them thicker to fit into the large hole. I wasn't sure what I was gong to do until I started cornrowing the locs at the front....the thing now is that the locs are fairly thick once you cornrow a bunch of them, and though I could cram the beads on there, they won't "hang" well, they would be too stiff. So once I cornrowed all the front, I just started fooling around with what I was going to do with the resulting braids, and I really liked the result, especially how long it makes her locs look....stretched out! Here it is:


So all I did, since I had six cornrows, with a part in the middle, is to braid the braids together that I got from doing the six cornrows. There was just enough to do one or two stitches of braid, then I gathered it together, barely, and I put four butterfly beads on a plain elastic (check back here for how to do this). Then I just randomly installed beads and snaps on some of her locs, tried to spread them out evenly. The beads are SO bright, which went along with her crazy green shirt, and she was all ready to perform at school!


I've done lots of beaded styles over the years but honestly against the black hair I still ADORE the bright rainbow look :)
 

Monday, May 23, 2011

Loving the Box Braids!

Hey all!  It's been over a week since I put in V's latest style, sorry for the delay in posting.  But the delay may be fortunate because now I am able to tell you how glad I am about the style I chose!

We decided to go with all over box braids.  That's it!  No cornrows, no beads, nothing!  It is funny because after I did the style I found out that there was a protective style challenge going on at Beads, Braids and Beyond.  Doing protective styles isn't really new to us, but it is a fun challenge that they have put out there.    Part of the challenge states that you may not use beads or rubber bands or things of that nature in your style.    I am happy to say that I follow this philosophy myself.  I like to switch back and forth between decorated styles and unadorned ones to give the hair a break.


My thought process for this style was that box braids might be the PERFECT summer style!  Steph directed you to this summer time post the other day and I am doing it again so that you can see what I am talking about.  Box braids can easily be worn under a bike helmet, a swim cap, whatever!  I can treat them like B's locs by putting in pigtails and ponytails and even french braids or other creative styles.  V is so excited about this style because she really likes to wear headbands and most of her styles don't allow for that!

Love those little curly ends!

After a week of this style I am happy to say her braids are still looking FABULOUS, almost like I just put them in!  I think we will leave them in for about 4 weeks.  Then after I do something different for a few weeks, I think I will put them in again!!!  That is how excited I am about using this as a summer style.  

I actually did a similar style last summer if you recall but I used twists and a few cornrows.  I didn't want any cornrows this time and I decided to go with braids because even though they take slightly longer to put in and take out, they have better longevity.  Besides, I have Miss B to help me take out braids now so that cuts down on time considerably!   


We were out of town this weekend and we stayed in a hotel with a pool.  I decided to be the best-mom-ever and let the girls go WITHOUT swim caps!  I had them soak their hair in the shower before getting in the chlorine and then of course we rinsed like crazy when they got out.  I can see how much the girls love the freedom of swimming sans caps and that makes me smile!  As I have said before, we don't swim that often, so I don't have a firm position on how important I feel the caps are for my girls.  I don't think I would want them swimming in chlorine daily without caps.   But, it just depends on if what you are doing is working and you don't notice damage, then go with it!


Look at those braids fly!

Locs fly too!

Katie

Tuesday, April 26, 2011

Tidbit Tuesday

*UPDATE ADDED*
Did You Know??????


That after all of the great suggestions on what to do with B's Easter style, I loved the BIG flower idea so much I ended up putting flowers in ALL my girls hair!


I purchased all of the flowers at the Dollar Tree!  Nothing like keeping it cheap!  I didn't attach them to any kind of clips or anything, I just kept the stems long enough when I cut them from the bunch so that I could stick them into the hair.  They held just fine!
The only real change I made to B's style from the first one was that instead of 3 cornrows I only did two.  I had said that maybe I would split up the hair from the middle cornrow and add it to the two outside ones.  This probably would have made things really bulky so instead, I just took that middle section of hair and did NOTHING with it!  After I finished the two outside rows I brought all the hair from the braids and the center section together in one ponytail holder.  See original style and finished style:


Ok, now that I look at the pictures, I realize I had actually done french braids, not cornrows in the original style.  They both look nice.  And I parted the hair slightly different the second time around.  But I loved the outcome.  It was lovely.

I don't have a step by step for V's style this time either.  But it is pretty basic.  I guess I am into the low side ponytail, because I did it on both girls!  I had cornrows start at the front left of her head  - do a sort of squiggle pattern - and then end at the lower right side.  To do this I started with the middle cornrow to set my pattern and then just worked out to the sides.  I finished with a puff!


I didn't really take pics of Little E's hair.  It was just two cornrows, a typical style for her.  I added the 3 little yellow flowers at the back.  Originally I also had one flower in the front, but it looked weird, so I took it out!


And that was Easter hair for Katie's girls!

I also gave Young Man C a fresh line up.  He is growing out his hair right now, because he is convinced that if he grows it, I will braid it.  We'll see about that!  Have I told you the story of the last time he grew it out?  Anyway, it was a BUSY hair weekend for me, but ended with a beautiful Easter Sunday with family!  Maybe I will post some family pics tomorrow.


Katie

Thursday, March 31, 2011

Update! Update! -Reverse Sun Ray

I am SO EXCITED!

You know how those lopsided pigtails from our latest style were bugging me...


Yeah, I was only able to put up with them for 2 days!  I was kind of bummed to just throw them into a ponytail because I though it would loose all of its originality.  So, I took the pony holders out and I just started cornrowing the twists together (like I have done in a lot of previous styles).  But because of the placement of the cornrows, as I worked form the right side to the left, everything started curving almost into a circle!  It was starting to form a bun without me even trying!  So after all of the twists were incorporated into the ONE cornrow, I braided them all the way to the end.  Then I just brought the end around and tucked it up under to form a circle.  I used a couple bobby pins to hold it firmly.


I absolutely love it!  Since the ends were in twists instead of braids, it gives a whole different look when you cornrow them together!  And I think this is the cutest bun!  All of the cornrows sort of swirl into the middle!!!


I added the white ribbon (I know I need to buy some other colors of ribbons!)  I just wrapped the ribbon around the bun, but I ran it under the one part of the cornrow on the right side.


This is not at all what I had originally had in mind when I started this style, but I am SOOOO loving it!  I like buns, they have such a princess/ballerina look about them.

On a side note, I LOVE seeing all of the beautiful pictures of hairstyles you mamas have been posting on our facebook group!  Keep them coming!


Katie

Popular Posts